Finger amputation tutorial.
Step 1
Make a small sausage of nose wax and apply it over your knuckle. Blend into the edges. Try to get your actor to stay still!

Step 2
Create the cut. If you do it properly you'll be able to open and close the wound on the joint.

Step 3
Seal with latex. When the latex has dried, brush over it with loose setting powder.
Be sure to keep your finger bent so the edges of the wound do not touch and stick together.

Step 4
Paint the prosthetic. Begin with the wound. I chose to have some exposed bone and tissue.
I recommend using skin illustrator or similar alcohol based make up.

Step 4 Con't
Add spatter. Use skin illustrator or similar product and a stipple brush or sponge.

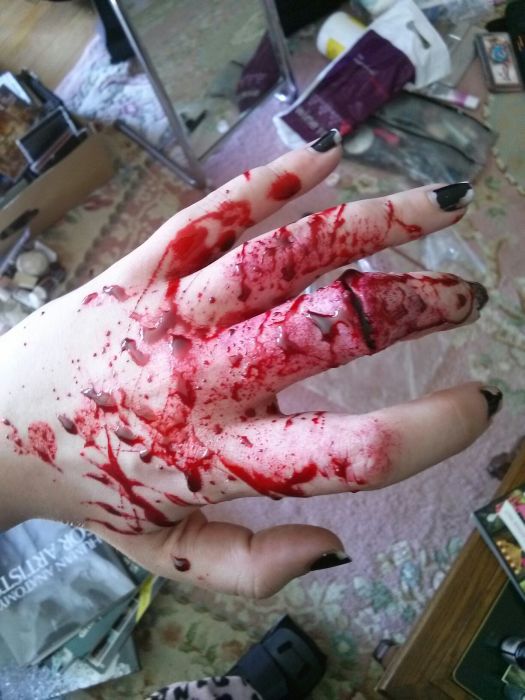
Step 5
Add blood! Fill the wound with blood and cover the appendage. There will also be spatter on the hand and surrounding digits.

Step 5 B
Less potato version of step 5.
Side view
Here you can see the depth of the wound. It's advisable to film this effect from the side

On set
Pour a small pool of blood on set and enjoy!
Yes there should be more blood on the knife. Oh well!

Step 1
Make a small sausage of nose wax and apply it over your knuckle. Blend into the edges. Try to get your actor to stay still!

Step 2
Create the cut. If you do it properly you'll be able to open and close the wound on the joint.
Step 3
Seal with latex. When the latex has dried, brush over it with loose setting powder.
Be sure to keep your finger bent so the edges of the wound do not touch and stick together.
Step 4
Paint the prosthetic. Begin with the wound. I chose to have some exposed bone and tissue.
I recommend using skin illustrator or similar alcohol based make up.

Step 4 Con't
Add spatter. Use skin illustrator or similar product and a stipple brush or sponge.
Step 5
Add blood! Fill the wound with blood and cover the appendage. There will also be spatter on the hand and surrounding digits.
Step 5 B
Less potato version of step 5.
Side view
Here you can see the depth of the wound. It's advisable to film this effect from the side
On set
Pour a small pool of blood on set and enjoy!
Yes there should be more blood on the knife. Oh well!

No comments:
Post a Comment